
Let’s be honest—most of us grew up throwing everything into a dryer and pressing start. It’s fast, easy, and familiar. But here’s the thing: that convenience comes with hidden costs. Shrunken wool sweaters. Stretched-out jeans. Faded blacks. Sky-high electricity bills. And a surprising amount of wear and tear on the clothes you love most.
Enter air drying. It’s not just for grandmas or off-grid living anymore. Modern clothes drying—done right—is faster, gentler, and smarter than you probably remember. Whether you have a sprawling backyard or a tiny apartment bathroom, this guide will help you dry your clothes beautifully, efficiently, and without crunchy towels.
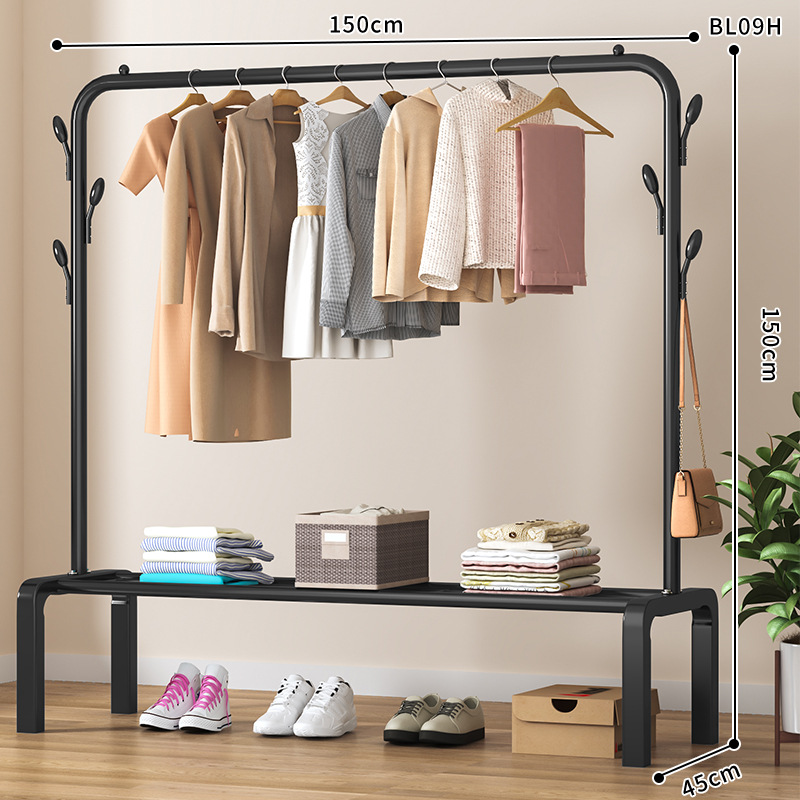
Part 1: Why Air Dry? The Case for Ditching (or Reducing) Your Dryer
The Benefits
1. Clothes Last Longer
Heat is brutal on fabric. It breaks down elastic fibers, fades dyes, and weakens seams. Air drying can double or triple the life of your clothes—especially delicate items like lingerie, athletic wear, and knits.
2. Save Money
The average clothes dryer costs between 0.30and0.90 per load in electricity. That adds up to 100–300 per year. Air drying costs exactly zero.
3. Reduce Your Carbon Footprint
Dryers are among the most energy-hungry appliances in your home. Skipping just three loads per week saves the equivalent of planting 10 trees annually.
4. Prevent Shrinkage
That favorite wool sweater didn’t actually change sizes—the dryer did. Air drying keeps your clothes fitting the way they should.
5. No More Static Cling
Dryer static is caused by over-drying. Air drying eliminates it completely. Say goodbye to flying skirt hems and clingy socks.
6. Fresh Outdoor Scent (If You Hang Outside)
There’s something magical about sun-dried sheets. That crisp, clean smell isn’t achievable in any dryer sheet or fragrance.
Part 2: The Essential Toolkit – What You Need to Air Dry
You don’t need much. But having the right tools makes all the difference.
Indoor Drying Equipment
| Item | Best For | Price Range |
|---|---|---|
| Folding drying rack | Most everyday laundry | 15–60 |
| Wall-mounted retractable rack | Small spaces, apartments | 20–50 |
| Over-the-door rack | Rentals, bathrooms | 10–30 |
| Ceiling-mounted pulley rack | Laundry rooms, mudrooms | 30–80 |
| Hanging octopus rack (with clips) | Socks, underwear, delicates | 10–25 |
| Heated drying rack | Cold/damp climates, faster drying | 80–200 |
| Dehumidifier | Humid homes, basements | 150–300 |
Outdoor Drying Equipment
| Item | Best For | Price Range |
|---|---|---|
| Traditional clothesline | Yards, sunny spaces | 10–30 |
| Retractable clothesline | Patios, balconies | 15–40 |
| Umbrella-style rotary dryer | Large families, big loads | 40–150 |
| Wall-mounted folding arm | Small outdoor spaces | 20–60 |
| Clothespins (spring or wooden) | Securing clothes to line | 5–15 |
Accessories That Help
- Drying nets – Lay sweaters flat to prevent stretching
- Hanger clips – Multiple clips on a single hanger for socks
- Pants hangers with bars – Hang pants by the cuffs to reduce wrinkles
- Sock dryer – A ring with multiple clips, hangs from any hook
- Sweater drying rack – Mesh surface, folds flat when not used
Part 3: The Art of Drying – How Each Fabric Behaves
Different fabrics need different treatment. Here’s your cheat sheet:
| Fabric | Best Drying Method | Pro Tip |
|---|---|---|
| Cotton | Line dry or rack | Can become stiff; tumble in dryer on no heat for 5 min afterward to soften |
| Wool | Lay flat on mesh rack | Never hang—weight of wet wool stretches it permanently |
| Silk | Lay flat on towel, away from sun | Sunlight fades silk; dry in shade |
| Linen | Line dry, then iron while damp | Linen wrinkles beautifully; embrace it or iron immediately |
| Denim | Hang by cuffs from clip hanger | Hanging by waistband stretches it out |
| Synthetics (polyester, nylon) | Line dry or rack | Dry quickly; keep away from direct heat |
| Athletic wear | Lay flat or hang | Heat ruins elastic and moisture-wicking technology |
| Delicates (lace, thin knits) | Lay flat on mesh | Direct hanging can stretch or deform |
| Towels | Line dry, then fluff in dryer | Prevents crunchiness; sun naturally bleaches and disinfects |
| Sheets | Line dry, fold while slightly damp | Sun-bleached whites look brighter |
Part 4: Drying Indoors – Making It Work in Any Space
No yard? No problem. Indoor drying is effective and discreet when done right.
Setup Tips for Small Spaces
Bathroom:
- Install a retractable line over the tub
- Use an over-the-door rack
- Run the exhaust fan to reduce humidity
Laundry Room:
- Wall-mounted folding rack
- Ceiling pulley system (old-school but amazing)
- Heated drying rack for winter
Living Room/Bedroom:
- Decorative folding rack that doubles as furniture
- Drying in plain sight works if the rack is attractive
- Position near a sunny window
Balcony/Patio:
- Retractable clothesline
- Folding umbrella dryer
- Ensure items are secured against wind
Managing Humidity
Indoor drying adds moisture to your air. That’s great in winter (hello, free humidifier) but problematic in summer or damp climates.
Solutions:
- Open windows for cross-ventilation
- Run a dehumidifier nearby (speeds drying significantly)
- Use a fan to circulate air
- Avoid drying in small, unventilated closets
Speed Drying Indoors
- Point a fan directly at the rack – Cuts drying time by 50%
- Spread items out – Overcrowding slows drying dramatically
- Hang shirts by the hem (upside down) – Allows airflow through the torso
- Use a heated drying rack – Game-changer for cold climates
- Spin clothes on high in washing machine – Removes maximum water before racking
Part 5: Outdoor Drying – The Classic Solution
Fresh air and sunshine are nature’s dryer, stain remover, and whitener all in one.
Best Practices for Outdoor Drying
Sunlight Tips:
- Sun naturally bleaches whites—take advantage
- Colors fade in direct sun; dry bright or dark items in shade
- Morning and late afternoon sun is gentler than midday
Wind Wisdom:
- Wind speeds drying dramatically
- Use clothespins strategically (two per heavy item)
- Light items may need extra clips or clothespin weighting
Rain Readiness:
- Check forecast before hanging
- Keep a backup indoor rack for unexpected showers
- Quick-dry fabrics can be hung despite light drizzle
What NOT to Hang Outside
- Wool, silk, cashmere – Sun damages fibers
- Bright or dark colors – Fade quickly in direct sun
- Delicate embellishments – Sun can melt glue or degrade beads
- Anything with elastic – Heat degrades elasticity
Clothespin Mastery
- Spring clothespins: Strong grip, best for heavy items
- Wooden clothespins: Traditional, leaves small marks (avoid on silk)
- Soft-grip silicone: Gentle on delicate fabrics
- Two-pin technique: One pin holds both edges of a shirt to prevent slipping
Part 6: How to Hang Specific Items (Without Ruining Them)
Shirts & Blouses
- Hang by the hem (bottom edge) – prevents shoulder bumps
- Or use a padded hanger through the shoulders
- Button top button to maintain shape
Pants & Trousers
- Hang by cuffs – weight pulls wrinkles out
- Or drape over the bar of a pants hanger
- Avoid hanging folded over a line (leaves crease)
Jeans
- Hang by cuffs from clip hanger
- Or drape over the rack bar
- Never hang by waistband – stretches out
Sweaters
- Lay flat on a mesh rack – never hang
- Reshape while damp
- Flip halfway through drying
Socks
- Hang in pairs using multi-clip hangers
- Or drape over the edge of a drying rack
- Never ball or bunch – prevents thorough drying
Underwear & Bras
- Hang bras by the center gore (between cups) – never by straps
- Lay flat on mesh for best shape retention
- Clip underwear by the waistband
Sheets & Towels
- Fold over the line, not draped – allows airflow between layers
- Pin at both ends to prevent blowing
- Shake vigorously before hanging to remove wrinkles
Part 7: Common Problems (And How to Fix Them)
| Problem | Cause | Solution |
|---|---|---|
| Stiff, crunchy towels | No agitation in drying | Line dry, then tumble on no heat for 5 min |
| Clothes smell musty | Too humid, drying too slowly | Add fan, dehumidifier, or move to sun |
| Faded colors | Direct sun exposure | Dry bright colors in shade |
| Stretched necklines | Hung by collar or draped wet | Hang by hem instead |
| Wrinkles everywhere | Overcrowded rack | Leave space between items; shake before hanging |
| Sweater stretched out | Hung instead of laid flat | Never hang knits – use mesh rack |
| Takes forever to dry | Overcrowding, no airflow | Spread out, add fan |
| Bird droppings | Outdoor drying hazard | Bring in during peak bird activity; wash again |
Part 8: Hybrid Drying – Best of Both Worlds
You don’t have to go all-or-nothing. Many households use a hybrid approach:
Method 1: Partial Dry in Dryer, Finish on Rack
- Run dryer for 10–15 minutes to soften and remove wrinkles
- Transfer to rack to finish drying
- Great for towels, jeans, sheets
Method 2: Rack Dry, Then Fluff
- Air dry completely
- Tumble in dryer on air fluff/no heat for 5–10 minutes
- Restores softness without shrinkage or heat damage
Method 3: Dryer-Safe vs. Air Dry Only
- Dryer: Underwear, socks, everyday cotton, towels (if you don’t mind crunch)
- Rack: Sweaters, jeans, delicates, athletic wear, anything with elastic, dark colors
Part 9: Seasonal Strategies
Spring & Summer
- Maximize outdoor drying – sun and wind are free
- Watch for pollen – allergy sufferers may prefer indoor drying
- Bring laundry in before evening dampness settles
Fall
- Take advantage of crisp, dry air
- Start transitioning to indoor drying as temperatures drop
- Sun is lower but still effective midday
Winter
- Indoor drying becomes primary method
- Use dehumidifier to manage moisture
- Heated drying rack is a worthy investment
- Hang racks near (not touching) radiators or heating vents
Rainy Seasons
- Reliable indoor setup is essential
- Rotate items on rack for even drying
- Use fan on full speed
Part 10: Space-Saving Drying Solutions for Tiny Homes
Behind-the-Door Wire Rack
- Folds flat against door when not used
- Holds one full load
- Perfect for bathrooms or laundry closets
Ceiling Pulley System
- Raises up toward ceiling when not used
- Vintage charm meets extreme functionality
- Requires ceiling mounting
Tension Rod Between Walls
- Creates instant line in hallway or alcove
- No drilling, removable
- Use with small clips or drape items directly
Shower Rod Multiplier
- Hang multiple hangers on existing shower rod
- Use with hanger clips for socks and underwear
- Zero additional equipment
Retractable Wall Line
- Pull out when needed, retracts when done
- Mount in laundry room, balcony, or garage
- Holds surprisingly heavy loads
Part 11: Making Air Drying a Habit
The biggest barrier isn’t equipment—it’s routine. Here’s how to integrate air drying into your laundry rhythm:
Step 1: Start Small
Pick one load per week to air dry. Towels are a great starting point—they’re forgiving and show immediate results.
Step 2: Set Up Your Station
Keep your drying rack permanently accessible. If you have to hunt for it, you won’t use it.
Step 3: Wash → Rack Immediately
The moment the washer finishes, transfer clothes to the rack. Don’t let wet laundry sit—it leads to musty smells.
Step 4: Spread, Don’t Pile
Resist the urge to cram. Clothes need breathing room. Two light loads dry faster than one overloaded rack.
Step 5: Flip and Rotate
Halfway through drying, flip heavier items and rotate the position of items on the rack.
Step 6: Fold Warm
If possible, fold or hang clothes while slightly damp. They’ll finish drying in your closet without wrinkles.
The Bottom Line
Air drying isn’t about deprivation or inconvenience. It’s about choosing gentleness for your clothes, savings for your wallet, and mindfulness for the planet. And with modern tools and smart techniques, it’s never been easier or faster.
Start with one rack. One load. One small change. Your clothes will last longer, your energy bills will drop, and you might just discover that sun-dried sheets or a perfectly air-fluffed towel bring a quiet joy that no dryer can match.
Do you air dry your clothes? What’s your setup—indoor rack, outdoor line, or something creative? Share your tips and tricks in the comments below!
